Clerk Integration
What is Clerk?
Clerk is a powerful authentication platform that allows you to implement user authentication, login, and registration without needing to manage your own backend database and API servers. It provides:
- User authentication and management
- Login and registration functionality
- Third-party authentication (Google, GitHub, etc.)
- User data collection (name, email, phone, etc.)
- Password strength configuration
- Waitlist functionality
How to Integrate Clerk?
Let's create a project and task management website with Clerk authentication. Here's a step-by-step guide:
Configure Clerk
- Log in to the Clerk Dashboard
- Navigate to the API keys page
- In the Quick Copy section, select JavaScript from the dropdown menu
- Copy the
<script>tag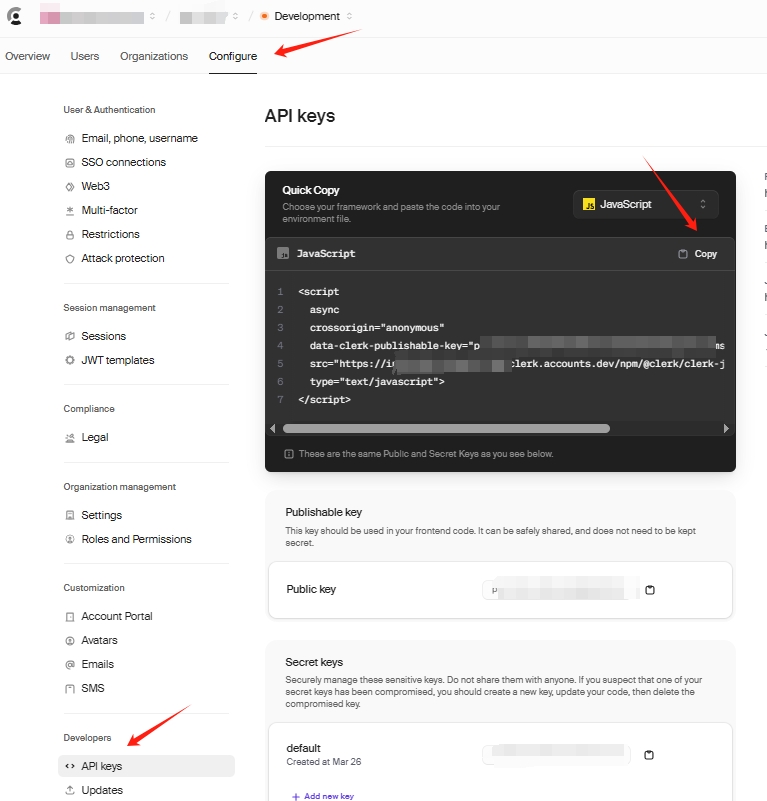
Implement Clerk Authentication
- Use the following prompt to create a website first:
Let’s build a beautiful project and task management app in the style of Asana.Let’s start by building a great looking homepage.
- Add the following code to implement Clerk authentication, and replace the placeholder with your own values:
Users should be able to login and signup using Clerk for authentication and user management.
This is Clerk JavaScript Script:
<script
  async
  crossorigin="anonymous"
  data-clerk-publishable-key="YOUR_PUBLISHABLE_KEY"
  src="https://YOUR_FRONTEND_API_URL/npm/@clerk/clerk-js@5/dist/clerk.browser.js"
  type="text/javascript"
></script>
Final Result
Once the website is created, users can:
- Register and log in using Clerk's authentication system
- Access the project management features with their authenticated accounts
Additional Features
Enable Waitlist Feature
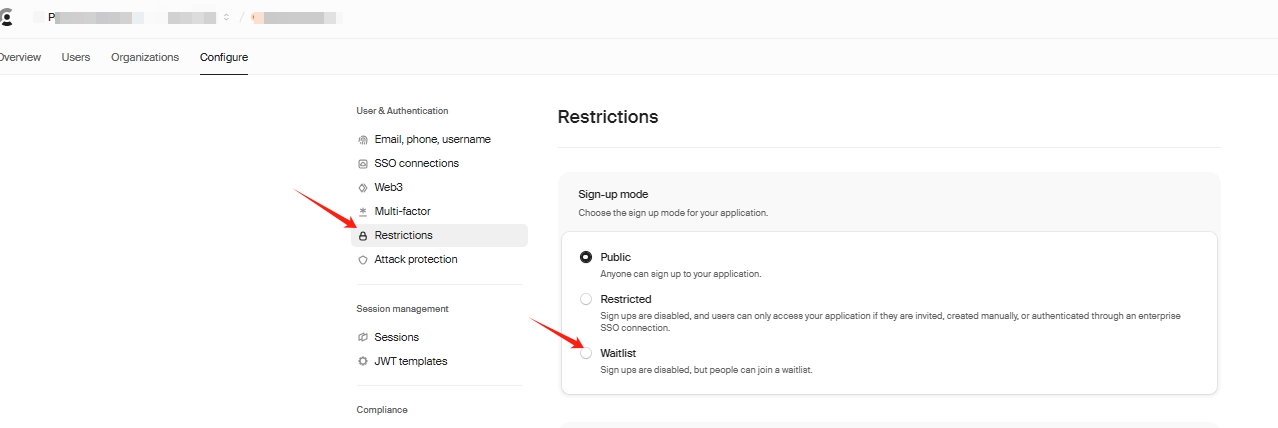
- Log in to the Clerk Dashboard
- Navigate to the Restrictions section
- Set the registration mode to waitlist
Implement Waitlist Functionality
Add the following code to implement waitlist functionality:
Use Clerk’s waitlist component to let users join while we build the rest of the app.